Interfacing Stepper Motor with 8051 (AT89C52)
Interfacing Stepper Motor with 8051
- Complete Video Course on AT89C52 Microcontroller
- Introduction
- Stepper Motor Basics
- Types of Stepper Motors
- Interfacing Components
- ULN2003 Driver IC
- Circuit Description
- Stepper Motor Control Sequence
- Working Explanation
- Circuit Design in Proteus
- Applications
- Summary
- Learn More
- Complete Video Course on AT89C52 Microcontroller
- 💬Frequently Asked Questions (FAQ)
Would you like to join our comprehensive practical video course on the AT89C52 Microcontroller?
Complete Video Course on AT89C52 Microcontroller

Introduction
Interfacing Stepper Motor with 8051: A stepper motor is an electromechanical device that converts electrical pulses into discrete angular movements. Each pulse sent to the stepper motor rotates its shaft by a fixed step angle, allowing precise control of position and speed. The AT89C52 microcontroller can easily control a stepper motor using digital outputs through a driver circuit such as ULN2003 or L293D. In this tutorial, you’ll learn how to interface a unipolar stepper motor with the AT89C52 microcontroller, understand its working principle, connection diagram, and implement a simple program to control its rotation direction and speed.
Stepper Motor Basics
A stepper motor divides a full rotation into several equal steps. It can rotate in both directions—clockwise (CW) and counterclockwise (CCW)—based on the sequence of control signals applied to its coils.
Key Characteristics:
- Works on the principle of electromagnetism
- Rotates in steps of fixed angle (commonly 1.8°, 7.5°, or 15°)
- Controlled by energizing coils in a particular sequence
- Suitable for precise angular and position control
Types of Stepper Motors
- Unipolar Stepper Motor:
- It has a center tap on each winding, easy to control.
- It requires 5 or 6 wires.
- Bipolar Stepper Motor:
- No center tap; requires current reversal for direction control.
- Needs an H-bridge driver like L293D.
In this tutorial, we’ll use a unipolar stepper motor driven by ULN2003 (Darlington transistor array).
Interfacing Components
- AT89C52 microcontroller
- ULN2003 driver IC
- Unipolar stepper motor (5 or 6 wires)
- Power supply (5V for control, 12V for motor)
ULN2003 Driver IC
The ULN2003 acts as a current amplifier, allowing the low-current I/O pins of the microcontroller to control the higher current required by the motor.
- Each channel can handle up to 500 mA.
- The motor coils are connected to outputs (pins 13–16).
- Inputs (pins 1–4) are connected to the microcontroller port pins.
Circuit Description
Connection Summary:
| Component | Pin | Connected To |
|---|---|---|
| ULN2003 IN1–IN4 | P2.0–P2.3 | Control lines from AT89C52 |
| ULN2003 OUT1–OUT4 | Motor Coil 1–4 | Stepper motor winding inputs |
| ULN2003 COM | +12V | Motor power |
| ULN2003 GND | GND | Common ground |
| AT89C52 | VCC, GND | +5V, GND |
Stepper Motor Control Sequence
The motor coils must be energized in a specific order to achieve rotation.
Full-Step Sequence (Clockwise):
| Step | Coil 1 | Coil 2 | Coil 3 | Coil 4 | Output (Hex) |
|---|---|---|---|---|---|
| 1 | 1 | 0 | 0 | 1 | 0x09 |
| 2 | 1 | 0 | 1 | 0 | 0x0A |
| 3 | 0 | 1 | 1 | 0 | 0x06 |
| 4 | 0 | 1 | 0 | 1 | 0x05 |
To rotate in a counterclockwise direction, reverse the order of the steps.
Example Code: Stepper Motor Control Using AT89C52
#include <reg51.h>
#define lcd P0
sbit rs = P3^0;
sbit en = P3^1;

void delay(unsigned int t)
{
    unsigned int i, j;
    for(i=0;i<t;i++)
        for(j=0;j<1275;j++);
}

void lcd_cmd(unsigned char c)
{
    lcd = c;
    rs = 0; en = 1; delay(2); en = 0;
}

void lcd_data(unsigned char d)
{
    lcd = d;
    rs = 1; en = 1; delay(2); en = 0;
}

void lcd_init()
{
    lcd_cmd(0x38);
    lcd_cmd(0x0C);
    lcd_cmd(0x06);
    lcd_cmd(0x01);
    lcd_cmd(0x80);
}

void lcd_string(char *s)
{
    while(*s)
        lcd_data(*s++);
}

char keypad_scan()
{
    unsigned char row, col;
    P2 = 0xF0;  // upper nibble inputs, lower nibble outputs
    while(1)
    {
        for(row=0; row<4; row++)
        {
            P2 = ~(1 << row);  // Set one row low at a time
            col = P2 & 0xF0;   // Read column lines
            if(col != 0xF0)
            {
                delay(10);      // Debounce delay
                switch(col)
                {
                    case 0xE0: return (row*4 + 0); // C0 low
                    case 0xD0: return (row*4 + 1); // C1 low
                    case 0xB0: return (row*4 + 2); // C2 low
                    case 0x70: return (row*4 + 3); // C3 low
                }
            }
        }
    }
}

void main()
{
    unsigned char key;
    char keys[16] = {'1','2','3','A','4','5','6','B','7','8','9','C','*','0','#','D'};
    lcd_init();
    lcd_string("Keypad Ready");
    lcd_cmd(0xC0);
    lcd_string("Press a Key:");
    while(1)
    {
        key = keypad_scan();
        lcd_cmd(0xC0);
        lcd_data(keys[key]);
        delay(500);
    }
}
Interfacing Stepper Motor with 8051
Working Explanation
- The motor has four control coils. Each coil is energized in a sequence to rotate the motor shaft.
- The delay between switching steps determines the motor’s speed.
- The ULN2003 driver provides the necessary current and voltage to drive the motor coils safely.
- Changing the sequence of coil energization reverses the rotation direction.
Circuit Design in Proteus
In Proteus, add:
- AT89C52 microcontroller
- ULN2003 driver IC
- Unipolar stepper motor (4-phase)
- Power source (12V for motor, 5V for MCU)
Connections: - Connect P2.0–P2.3 of AT89C52 to ULN2003 IN1–IN4.
- Connect ULN2003 OUT1–OUT4 to motor coils.
- Connect COM to +12V and GND to common ground.
Run the simulation and observe the motor rotating in both directions alternately.
Applications
- CNC machines and 3D printers
- Robotic arms and precise angular control systems
- Automated conveyor systems
- Camera pan/tilt mechanisms
Summary
The AT89C52 microcontroller can control a stepper motor efficiently using the ULN2003 driver. By energizing the motor coils in proper sequence, precise position and direction control can be achieved. This concept forms the basis for motion control in robotics and mechatronic systems.
Learn More
Do you want to go beyond just configuration and build real embedded projects?
🎓 Join our Complete Practical Video Course to Master the AT89C52 Microcontroller.
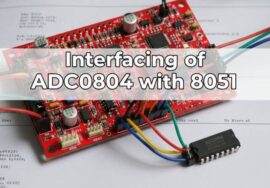
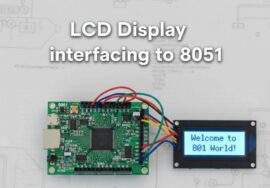
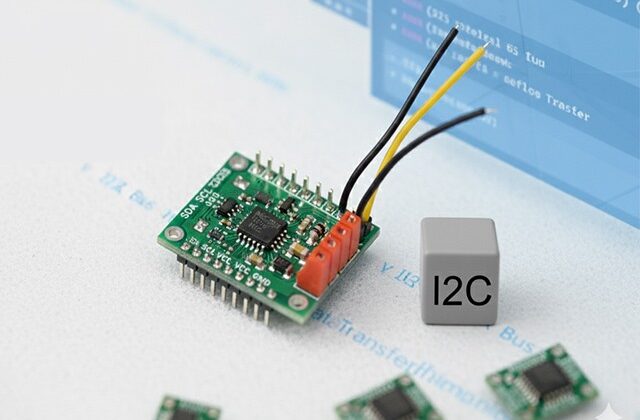
Get step-by-step guidance on Timers, Interrupts, UART, I/O Interfacing, ADC (using ADC0804), and I²C/SPI (Software Implementation) — with real circuits, simulations, and hardware demonstrations!
Complete Video Course on AT89C52 Microcontroller
Downloading and Installing Keil µVision IDE
- Visit the official Keil website at https://www.keil.com or KEIL IDE
- Navigate to the Downloads → C51 Compiler section.
- Register (if required) and download the latest version of Keil µVision for 8051 (C51).
- Run the installer and follow the on-screen instructions.
- Once installed, launch the Keil µVision IDE from the Start Menu.