Embedded Development_02
- Tools & Project Ideas for Engineering Students
- 1. Why Embedded Software Tools Matter
- 2. Platform Highlight: The PIC18F4550 Microcontroller
- 3. Recommended Software Toolchain
- 4. Project Development Workflow: Step by Step
- 5. Cool Project Ideas You Can Try (with PIC18F4550)
- 6. Tips for Success & Avoiding Common Pitfalls
- 7. How Bitziga Can Help You
Tools & Project Ideas for Engineering Students
Are you an engineering student eager to build real-world embedded systems and take your skills beyond theory? At Bitziga, we believe the best learning happens when you code, test and build. Below, we’ll guide you through some key software tools and microcontroller platforms – and show you project ideas you can start now.
1. Why Embedded Software Tools Matter
Modern embedded development is not just wiring and breadboards — it’s about combining hardware and software tools to develop, debug and deploy your application. Choosing the right IDE, compiler and microcontroller platform can significantly shorten your learning curve and help you focus on creativity.
One of the key tools is MPLAB X IDE — the integrated development environment from Microchip Technology — which supports many PIC® microcontrollers and provides simulation, debugging, compiler integration, project management and more. Microchip
Using a tool like MPLAB X means you can concentrate on what your code does (e.g., reading sensors, driving motors) rather than how you load and debug it. This is especially helpful if you’re working on projects as part of coursework or self-learning.
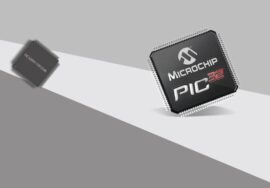
2. Platform Highlight: The PIC18F4550 Microcontroller
If you’re looking for a strong, proven microcontroller platform for student projects, the PIC18F4550 is a popular choice. Some of its features include:
- An 8-bit PIC18 family microcontroller with enhanced flash memory and nano-watt technology. Components101 Microchip
- Multiple I/O lines, timers, A/D converter, SPI/I²C support, PWM modules — which means you can interface many sensors, displays, motors, etc. Futurlec
- Built-in USB support (USB 2.0 compliant) on certain variants, making interface to PC or USB peripherals easier. Microchip
- Wide project support online: you’ll find tutorials, project ideas, source codes for the PIC18F4550.
What does this mean for you? It means fewer platform limitations and more room to experiment: sensor reading and data logging, USB interface, motor control, display interfaces, communication protocols — everything a student project needs.
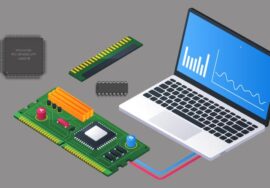
3. Recommended Software Toolchain
Here’s a typical toolchain you might adopt when working with PIC18F4550 (or similar microcontrollers):
- MPLAB X IDE — Create your project, set up device (PIC18F4550), configure settings, compile and debug.
- XC8 Compiler — Microchip’s C compiler for 8-bit PIC devices, integrated into MPLAB X.
- Simulator / Debugger — Use MPLAB’s built-in simulator or hardware debugger (PICkit or ICD) to step through your code, inspect registers and watch variables.
- Programmer/Debugger Hardware – For actual hardware deployment, you’ll need a programmer (like PICkit) to load the hex file onto PIC18F4550.
- Additional Tools & Libraries — Depending on your project: display driver libraries, USB stack (if using USB), sensor libraries, communication stacks, etc.
- Version Control & Documentation — Even for student work, using Git (or similar) and documenting your code, circuit, and design choices pays off.
By mastering the above, you’ll not only complete projects — you’ll build a portfolio of engineering discipline: toolchain setup, debugging methodology, version control and project documentation.
4. Project Development Workflow: Step by Step
Here’s a generic workflow you can follow (and tweak) for your embedded project:
- Step 1: Define the Objective
What do you want to build? Example: temperature logger, USB-controlled motor driver, IoT sensor node, automatic door lock, etc. Make it clear and measurable. - Step 2: Choose Hardware Platform & Components
Select PIC18F4550 (or similar) as the microcontroller. Choose sensors/displays/motors/interfaces you’ll need. For example: DS18B20 temperature sensor, LCD display, keypad, USB interface, motor driver. - Step 3: Set Up Toolchain
Install MPLAB X, set up a project targeting PIC18F4550. Configure oscillator, configuration bits, I/O assignments. Compile a simple “hello world” (e.g., blink LED) to confirm hardware + toolchain are working. - Step 4: Develop & Test Modules One by One
- Interface the sensor: write code to read analog/digital input.
- Interface the output: display data on LCD/LEDs, drive a motor, send over USB.
- Write basic communication routines: SPI, I²C, USB, etc.
- Use a debugger to step through the code and fix the logic.
- Integrate modules: combine sensor + display + communication.
- Step 5: Build the Overall Application Logic
– Define states or modes (e.g., idle, measuring, logging, sending).
– Add error handling, calibration and power management (sleep/idle modes).
– Add user interface (buttons/keypad) or remote control (USB/PC).
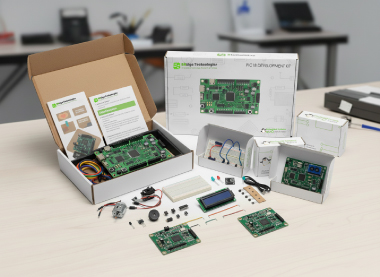
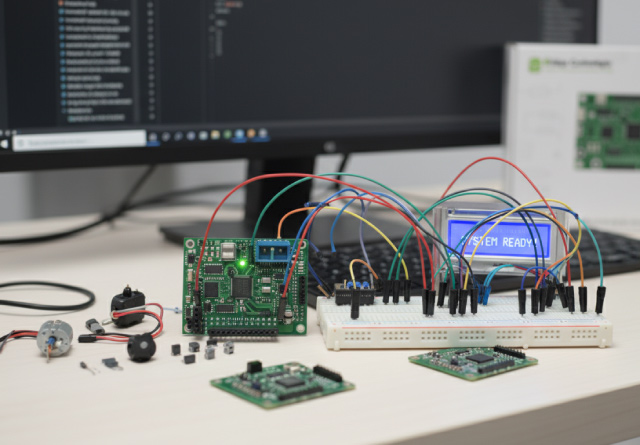
– Optimize: reduce power, minimize memory usage, ensure reliable communication. - Step 6: Prototype & Test on Hardware
– Build the physical circuit (breadboard or PCB).
– Test under realistic conditions (noise, different sensors, varying power supply).
– Log data, check reliability (reset conditions, unexpected input, etc.).
– If USB is involved, validate enumeration, driver interaction and host communication. - Step 7: Document and Present
– Write project report: objective, hardware block diagram, software flowchart, source code summary, test results, lessons learned.
– Prepare demonstration: short video or live demo showing your system in action.
– Ensure code is commented and version-controlled.
5. Cool Project Ideas You Can Try (with PIC18F4550)
Here are some ideas (with increasing complexity) — great for coursework, competitions, or self-learning portfolios:
- USB-based PC Interface Module
Using PIC18F4550’s USB capabilities, you can build an interface board that communicates with a PC (USB HID or CDC). For example: control LEDs, motors or relays via PC software. - Sensor Data Logger
Use a temperature/humidity sensor (e.g., DHT11/DHT22), log readings to an SD card or transmit via USB to PC. Display readings on an LCD. - Real-Time Clock & Alarm System
Interface a RTC module (e.g., DS1307/DS3231) and use PIC18F4550 to build a clock with alarms, keypad interface and display. - Stepper Motor Controller with Remote Control
Drive a unipolar/bipolar stepper motor via PIC18F4550, remote control via IR or RF modules, and optionally USB interface for PC control. - Home Automation Sensor Node
Combine analog sensors (light, temperature, gas), interface them with PIC18F4550 and send data to PC or drive actuators (relay for lights/fan). Use I²C/SPI sensors and practice low-power modes. - USB MID/Keyboard Device
Turn PIC18F4550 into a USB HID keyboard/mouse/clavier sending commands to PC. Great for exploring USB protocol and host-device interaction.
6. Tips for Success & Avoiding Common Pitfalls
- Start simple. Begin with the blink LED, then expand to the sensor, then the communication.
- Use the debugger. Stepping through code, checking registers and logic will save you hours of frustration.
- Power management matters. Many student projects ignore idle/sleep modes and PCB layout, but thinking about power shows maturity.
- Use version control. Even for student code: track changes, document experiments and rollback when necessary.
- Read the datasheet. For PIC18F4550, features like USB endpoints, oscillator configuration, A/D, interrupts all come with details. Microchip
- Make it reliable. Test under different conditions: voltage variation, sensor variation, long runs—your project should just work, not just work once.
- Document your work. Good reports, annotated code, design diagrams—this will help for evaluation, for your portfolio, for future use.
- Explore beyond basics. Once you’re comfortable, challenge yourself: composite display, multiple sensors, wireless communication, or create a user interface. These level up your learning.

7. How Bitziga Can Help You
At Bitziga, we provide hands-on labs, guided practice and code examples for embedded systems. If you’re using PIC18F4550 (or other microcontrollers) and want to go deeper — for example, by adding network layers, WiFi/ethernet connectivity, IoT features — our tutorials, practice sessions and peer-group projects can accelerate your progress.