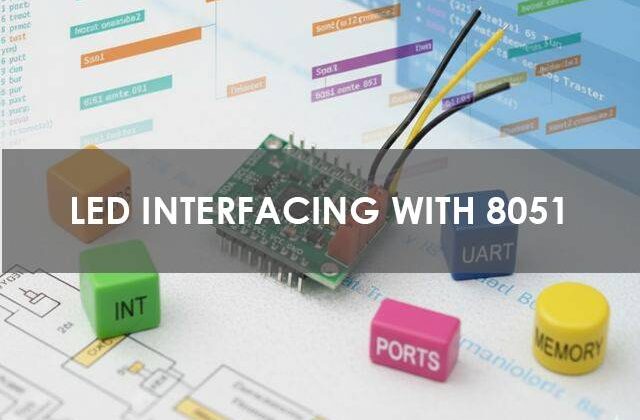
Interfacing LEDs and Switches with 8051 (AT89C52)
LED interfacing in 8051
Would you like to join our comprehensive practical video course on the AT89C52 Microcontroller?
Complete Video Course on AT89C52 Microcontroller

Introduction
LED interfacing in 8051: Interfacing LEDs and switches is one of the most fundamental tasks in embedded systems development. It helps beginners understand digital input and output operations, port configuration, and bit-level control of microcontroller pins. In the AT89C52 microcontroller, the GPIO ports (Port 0 to Port 3) can be used for both input and output operations, making it simple to connect LEDs, push buttons, and other digital components.
Understanding I/O Ports of AT89C52
The AT89C52 microcontroller has four 8-bit I/O ports — Port 0, Port 1, Port 2, and Port 3, each consisting of 8 pins. These ports are bit-addressable and can be individually controlled using C programming.
- Port 0 (P0.0 – P0.7): Acts as dual-purpose pins. When external memory is used, it functions as the multiplexed address/data bus. When used as GPIO, external pull-up resistors are required.
- Port 1 (P1.0 – P1.7): Dedicated I/O pins with internal pull-up resistors.
- Port 2 (P2.0 – P2.7): Used for higher-order address bus when external memory is connected; otherwise, general I/O.
- Port 3 (P3.0 – P3.7): Has alternate functions like serial communication, interrupts, timers, etc.
Interfacing LEDs with AT89C52
LEDs are output devices that emit light when current flows through them. In most cases, LEDs are connected to the microcontroller through a current-limiting resistor (typically 220Ω to 1kΩ).
There are two common LED connection types:
- Active High: LED turns ON when the microcontroller output is logic 1.
- Active Low: LED turns ON when output is logic 0 (commonly used with AT89C52 ports having internal pull-ups).
Circuit Description: - Connect the anode of the LED to Vcc (5V) through a resistor.
- Connect the cathode to the microcontroller port pin (for active-low logic).
When the port pin outputs 0, the LED glows; when 1, it turns off.
LED interfacing in 8051
Example: Blinking LED on Port 1.0
#include <reg51.h>
sbit LED = P1^0;   // Define LED at pin P1.0
void delay(unsigned int t)
{
    unsigned int i, j;
    for(i=0; i<t; i++)
        for(j=0; j<1275; j++);
}
void main()
{
    while(1)
    {
        LED = 0;     // Turn ON LED
        delay(500);
        LED = 1;     // Turn OFF LED
        delay(500);
    }
}Interfacing Switches with AT89C52
Switches (push buttons) are input devices. They provide either a HIGH (1) or LOW (0) logic level depending on their state. Normally, switches are connected with pull-up resistors so that the input pin reads logic 1 when not pressed and logic 0 when pressed.
Circuit Description:
- Connect one side of the switch to GND.
- Connect the other side to the microcontroller input pin (e.g., P2.0).
- Enable the port’s internal pull-up (by writing 1 to the bit).
Example: LED Control using Switch
This example turns an LED ON when the switch is pressed and OFF when released.
#include <reg51.h>
sbit LED = P1^0;     // LED connected to Port 1.0
sbit SW = P2^0;      // Switch connected to Port 2.0
void main()
{
    P2 = 0xFF;       // Configure Port 2 as input (activate pull-ups)
    while(1)
    {
        if(SW == 0)  // Switch pressed (active low)
            LED = 0; // Turn ON LED
        else
            LED = 1; // Turn OFF LED
    }
}Circuit Design in Proteus
In Proteus, use AT89C52, an LED, and a push button.
- Connect the LED anode to 5V through a 330Ω resistor and cathode to P1.0.
- Connect one side of the push button to ground and the other to P2.0.
- Add a pull-up resistor (10kΩ) on P2.0 to Vcc if necessary.
When you press the switch, the LED should glow in the simulation.
Applications
- Status indicators (system ON/OFF, error, etc.)
- Simple user input detection (buttons, switches)
- Debugging or program testing (using LEDs as visual outputs)
- Combination of LED and switch for menu or mode selection
Summary
The AT89C52 microcontroller’s ports can easily handle digital input and output devices like LEDs and switches. Using internal pull-ups and simple logic, you can design circuits to indicate system states or receive user inputs. This fundamental concept forms the base for advanced interfacing applications like keypads, displays, and sensors.
Learn More
Do you want to go beyond just configuration and build real embedded projects?
🎓 Join our Complete Practical Video Course to Master the AT89C52 Microcontroller.
Get step-by-step guidance on Timers, Interrupts, UART, I/O Interfacing, ADC (using ADC0804), and I²C/SPI (Software Implementation) — with real circuits, simulations, and hardware demonstrations!
Complete Video Course on AT89C52 Microcontroller
Downloading and Installing Keil µVision IDE
- Visit the official Keil website at https://www.keil.com or KEIL IDE
- Navigate to the Downloads → C51 Compiler section.
- Register (if required) and download the latest version of Keil µVision for 8051 (C51).
- Run the installer and follow the on-screen instructions.
- Once installed, launch the Keil µVision IDE from the Start Menu.
# IO PORTS in 8051#KEIL #LED interfacing in 8051 # programming 8051 #GPIO # AT89C52 #LED